How to Backup Your WordPress Website Manually (Step-by-Step Guide)

Keeping a manual WordPress backup of your website is one of the most important safety measures you can take. If your site ever gets hacked, breaks after an update, or your hosting faces issues, having a website backup means you can restore your website quickly. In this comprehensive WordPress manual backup guide, we’ll show you exactly how to backup WordPress manually without using any plugin, in a simple and beginner-friendly way.
Why Manual WordPress Backup is Important?
- Full Control: You decide what to backup and where to store it.
- No Plugins Needed: Reduces dependency on third-party tools.
- Reliable Safety: Even if your hosting fails, your files are safe with you.
What You Need Before Starting Your WordPress Backup
Before we start backing up, it’s important to understand what makes up your WordPress website. Your site is made of two main parts: the files and the database. Knowing the difference will help you create a complete backup and ensure you can fully restore your site if something goes wrong.
- Files = everything that makes your site look and work (themes, plugins, uploaded images, WordPress program files).
- Database = the words and content (posts, pages, comments, settings, users).
- A full backup = Files + Database.
You only need two things:
- Your Hosting cPanel Login: Most web hosting companies like Hostinger, Bluehost, or SiteGround provide cPanel access.
- A Computer with Internet: To download and save your backup files safely.
Step 1: Login to Your cPanel for WordPress Backup
Go to your hosting account and look for an option called cPanel (e.g. Hostinger calls it hPanel hpanel.hostinger.com). Once inside cPanel, you’ll find all the tools to manage your website. Think of cPanel as the control room of your WordPress website.
Step 2: Backup Your WordPress Files
Your WordPress site is made up of files (like themes, plugins, images, and core files). Let’s back them up with a complete file backup:
In the following steps, we’ll use Hostinger’s hPanel as an example. If you are using a different hosting provider, the process will be very similar, since most hosting control panels follow the same general concept.
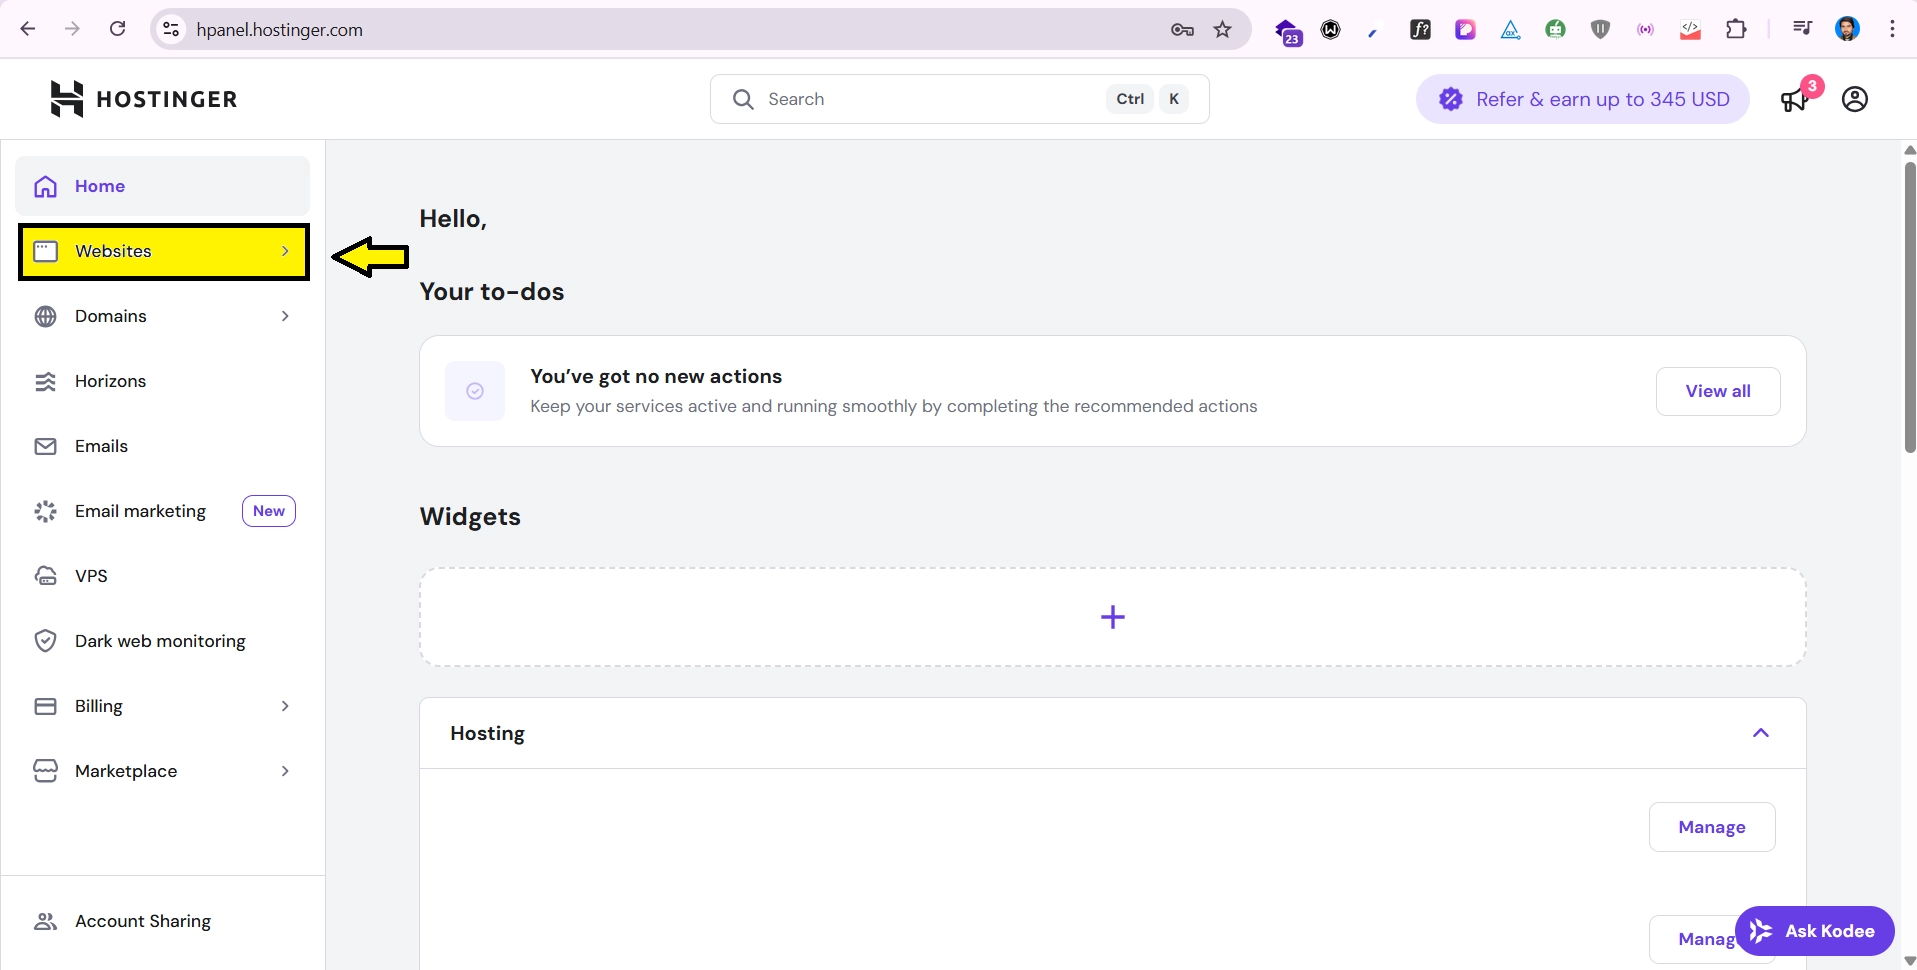
- Inside hPanel, On the left-hand side of the dashboard, click “Websites”.
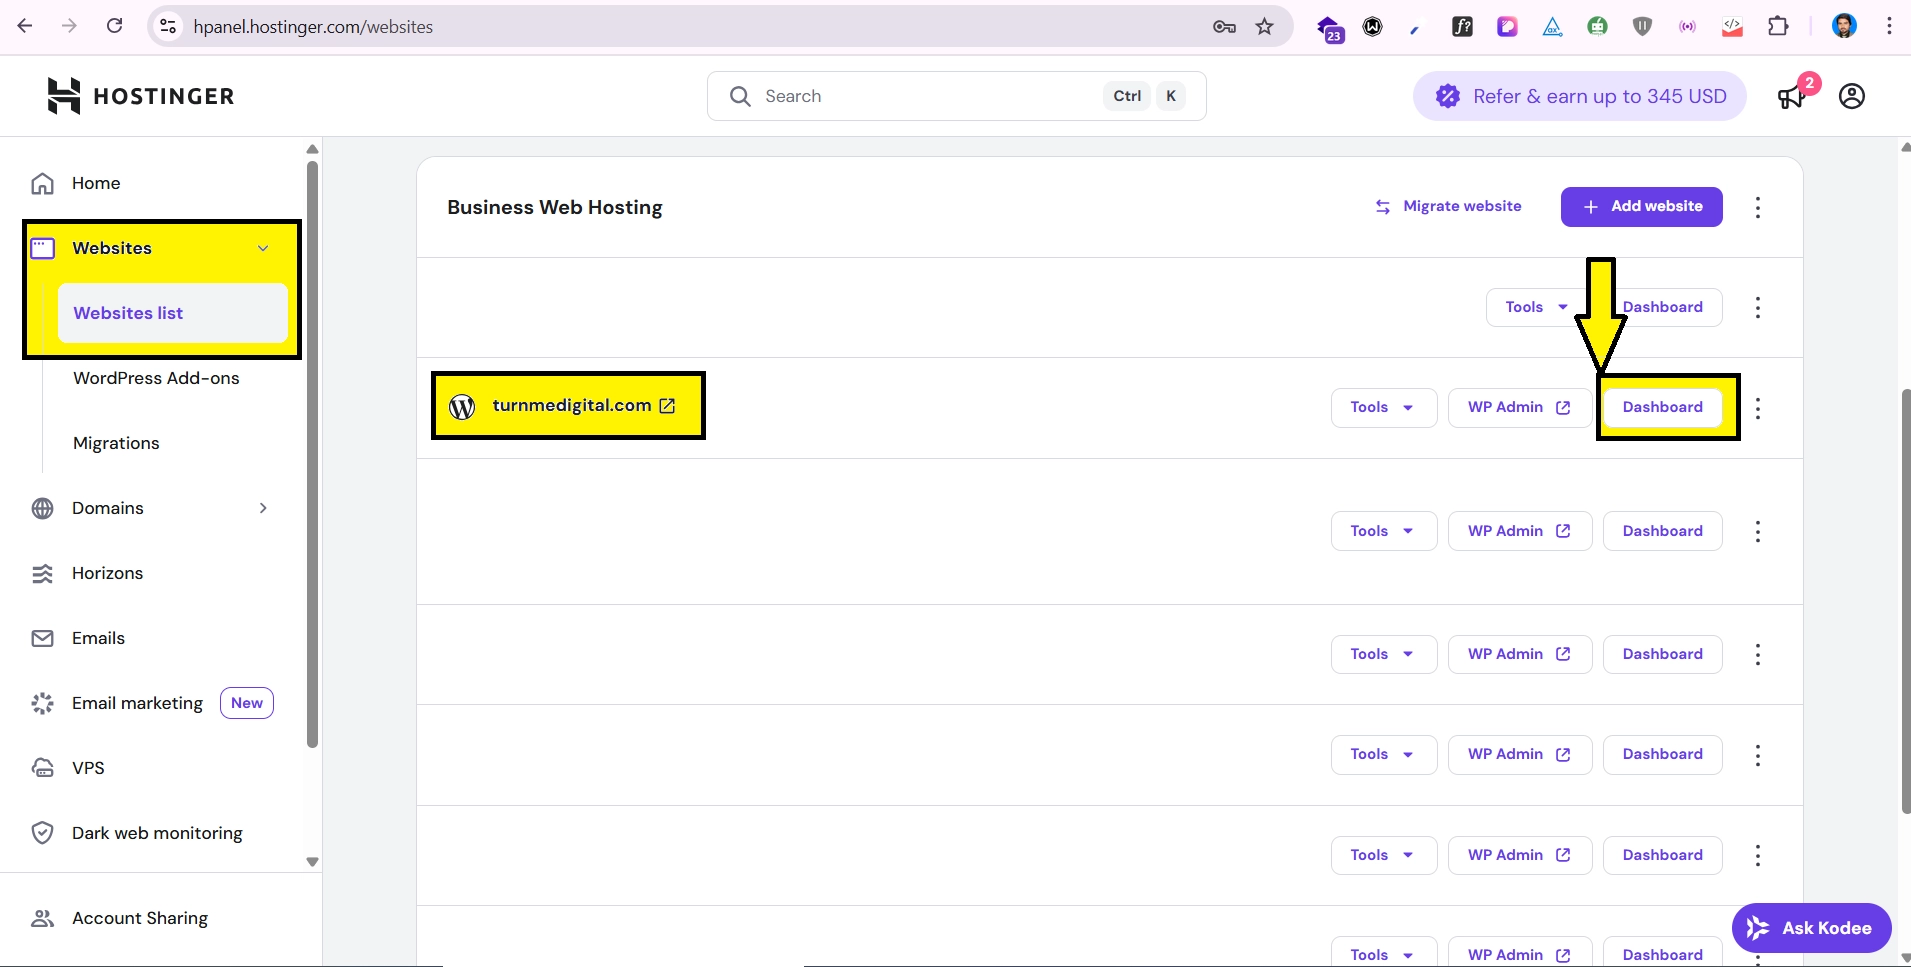
- In the website list, find the website you want to manage and click on “Dashboard”.
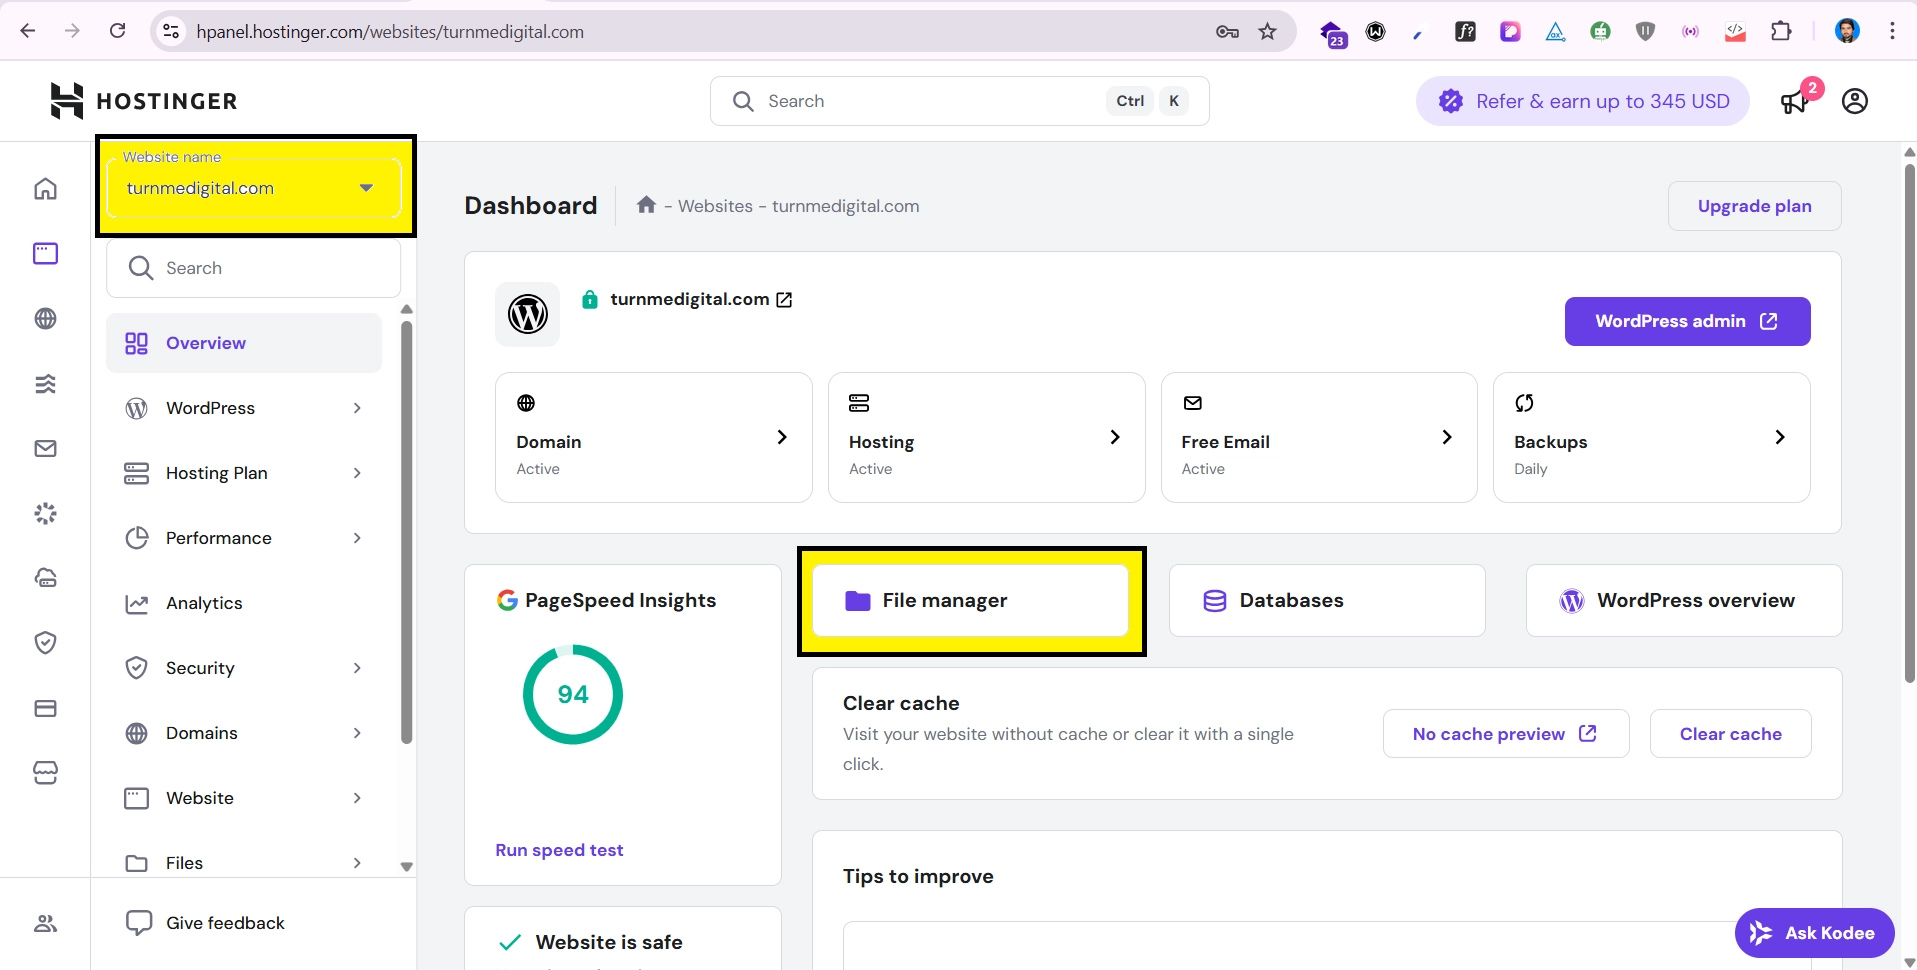
- Inside the website dashboard, click “File Manager”.
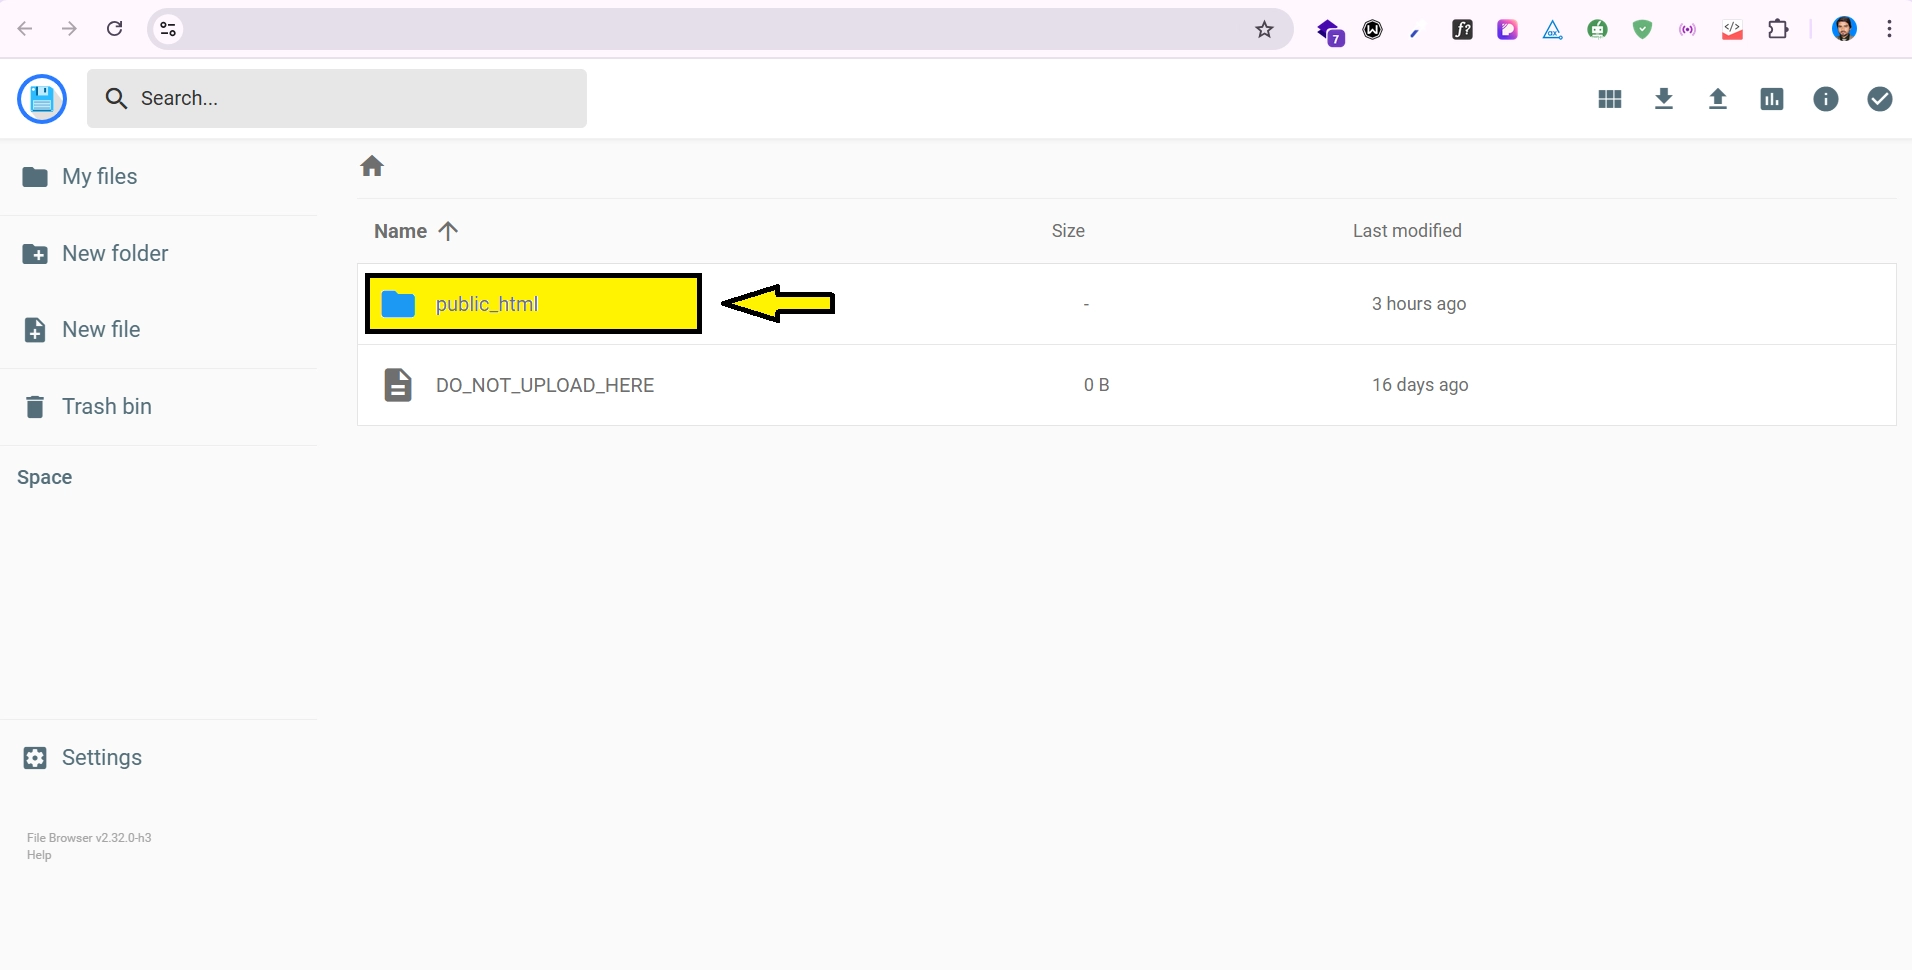
- Navigate to the folder named public_html. This is where your WordPress website is stored.
- Select all (Ctrl+A) the files and folders inside public_html and Download them using arrow down button for your WordPress files backup.
- Choose Zip and name it something like website-backup.zip and save it on your computer for your file backup.

With all your WordPress files safely backed up, we can now move on to securing the database, which contains all your site’s content and settings.
Step 3: Backup Your WordPress Database
Your database contains all the important information like posts, pages, comments, and settings. Without a proper database backup, your website backup is incomplete.
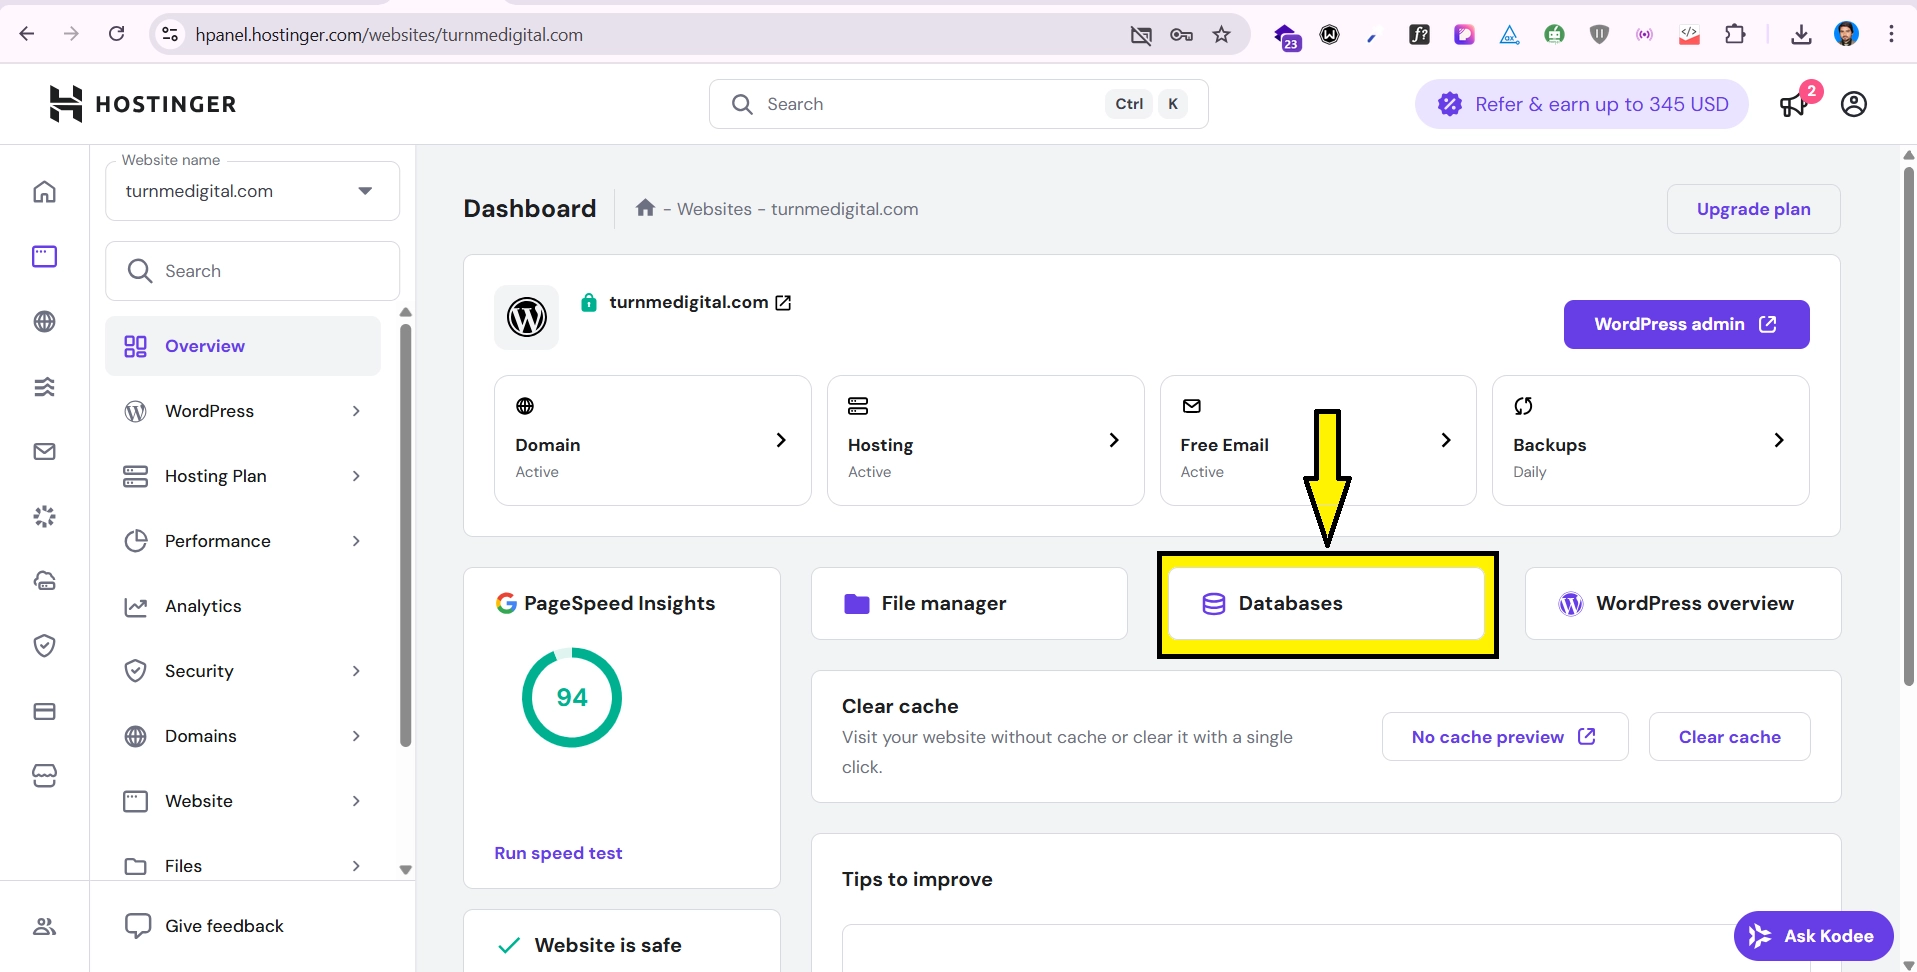
- Go back to hpanel in website dashboard, click “Databases”.
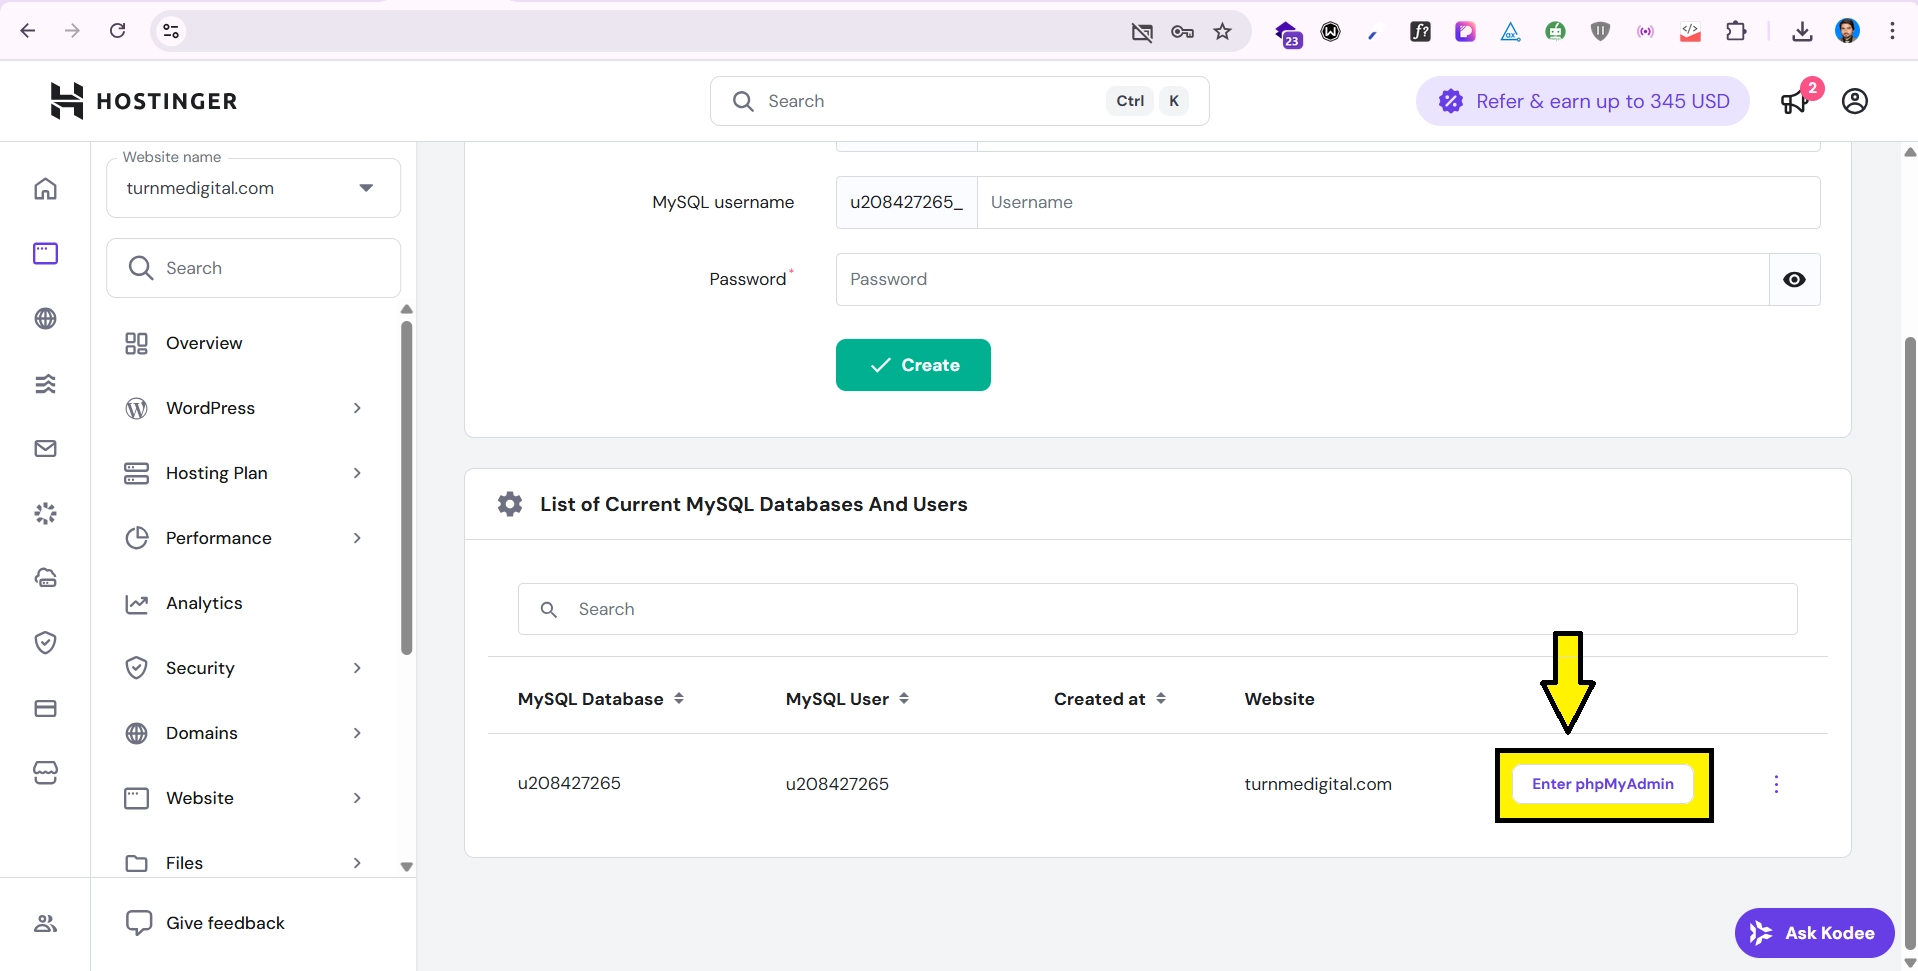
- From list of databases choose database you want to backup and click “Enter phpMyAdmin“.
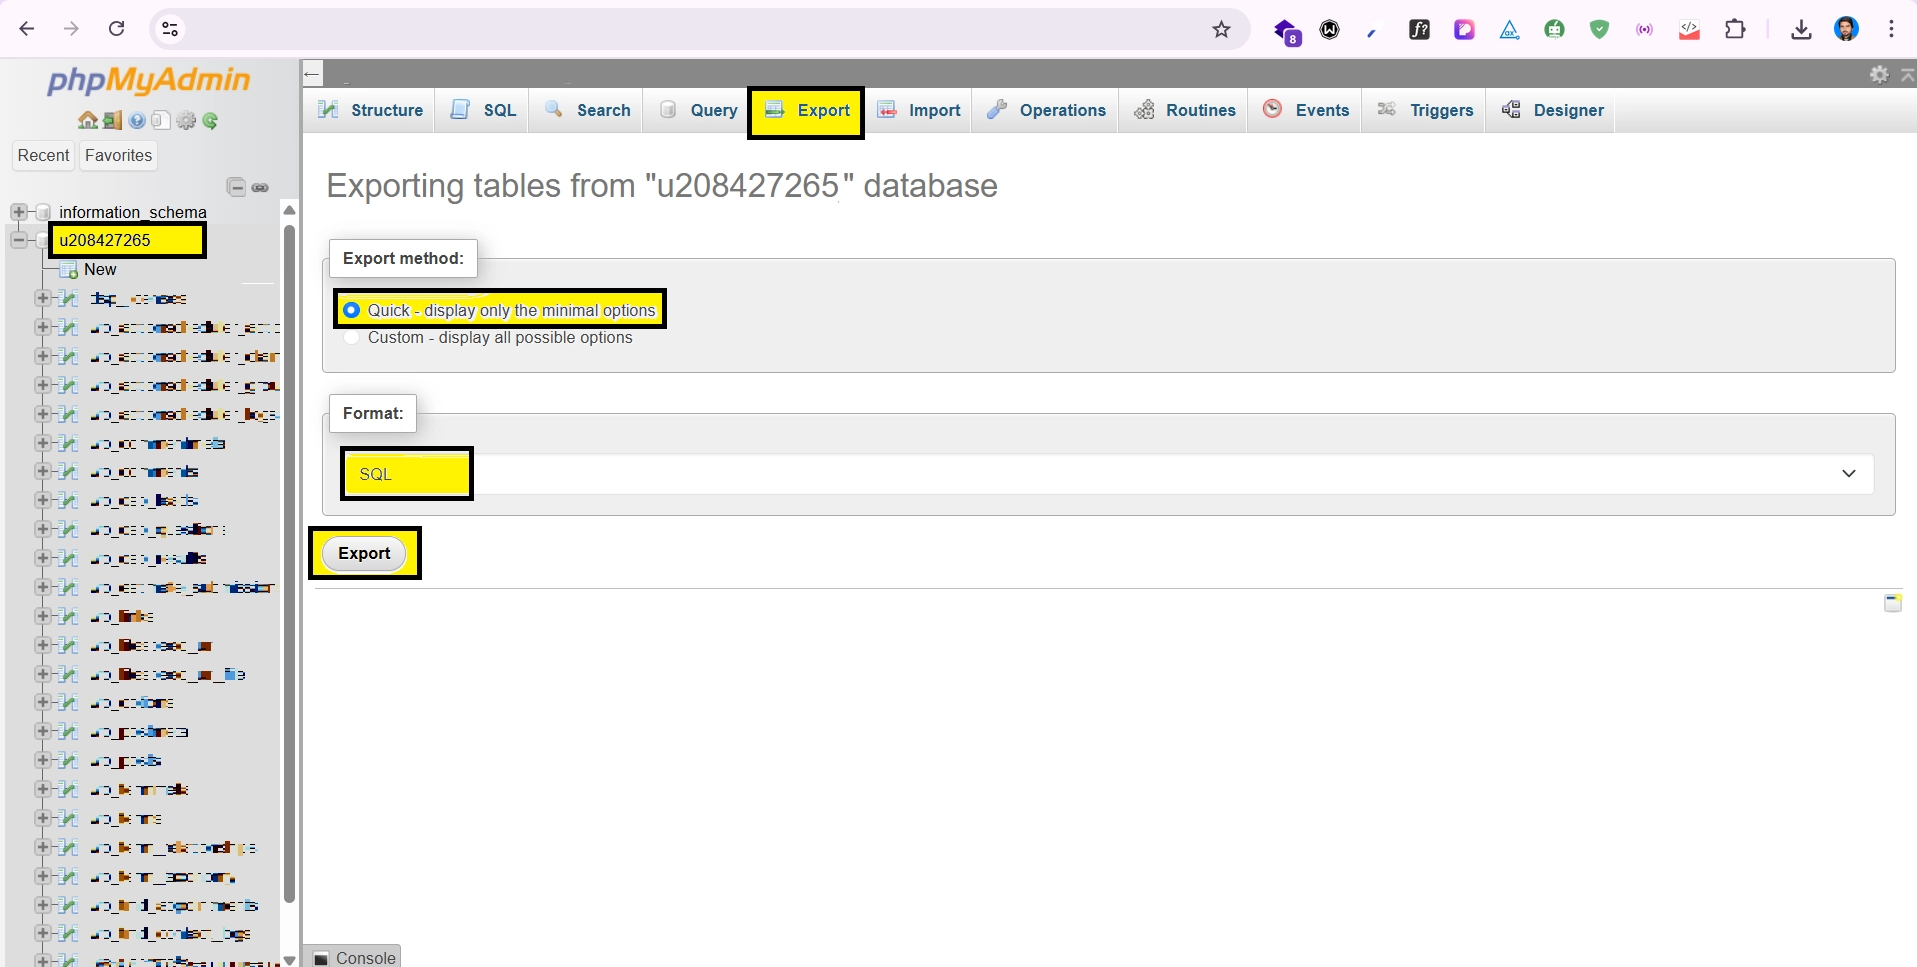
- Inside phpMyAdmin, On the left-hand side verify and select database name then Export tab at the top.
- Choose Quick Export and format as SQL. Click Export. This will download a file e.g. database-name.sql to your computer for your WordPress database export.
If your hosting account contains multiple databases and you are unsure which one belongs to your WordPress site, you can verify it in the wp-config.php file located in your WordPress root folder. Open this file and look for the following lines, which specify the database name and username used by your site:
define('DB_NAME', 'your_database_name_here');
define('DB_USER', 'your_database_user_here');
Step 4: Store Your WordPress Backup Safely
Now that you have both your files and database, make sure you store them properly:
- Save them on your computer in a folder named Website Backups.
- Also, upload a copy to Google Drive, Dropbox, or OneDrive for extra safety.
- If possible, keep a copy on an external hard drive.
How to Restore Your Website from WordPress Backup
If something goes wrong and you need to restore your website:
- Upload your website-backup.zip back to public_html and extract it.
- Go to phpMyAdmin, select your database, and use the Import option to upload your database-backup.sql.
Your website will be back to the exact state it was when you took the backup.
Final Thoughts
Manual backups may take a little time, but they give you complete control and peace of mind. By following this comprehensive WordPress backup tutorial, you now know exactly how to backup WordPress manually step by step. Make it a habit to create a new WordPress backup before making big changes, like installing plugins, updating WordPress, or editing your theme.
Recommended: Do a manual backup at least once a month, or weekly if you update your website often.